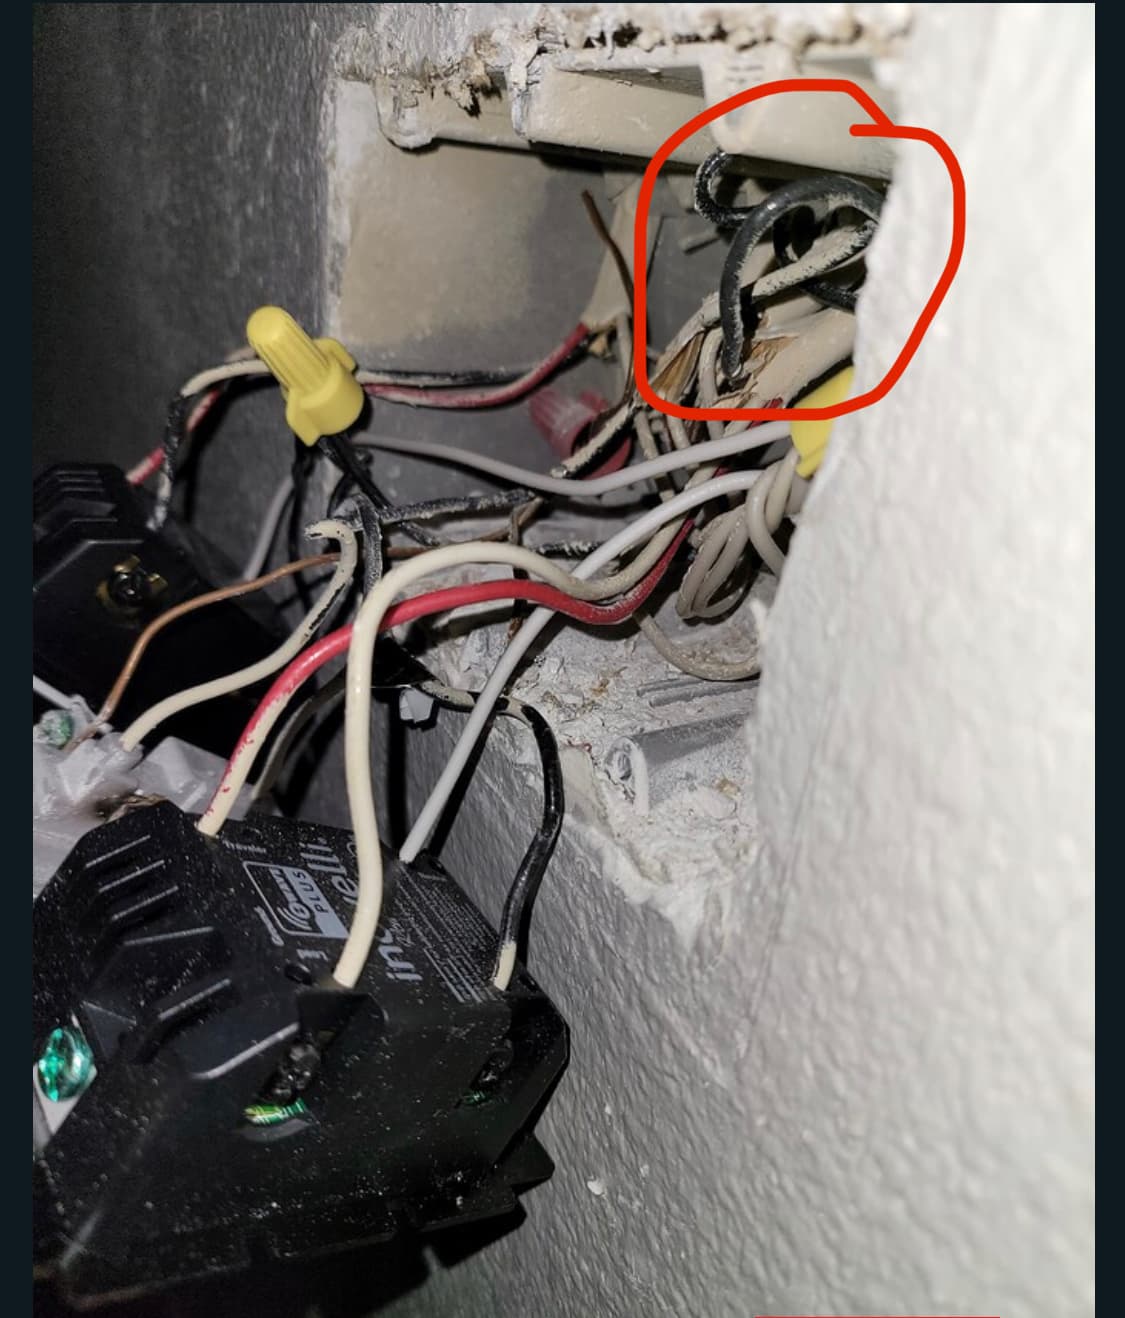
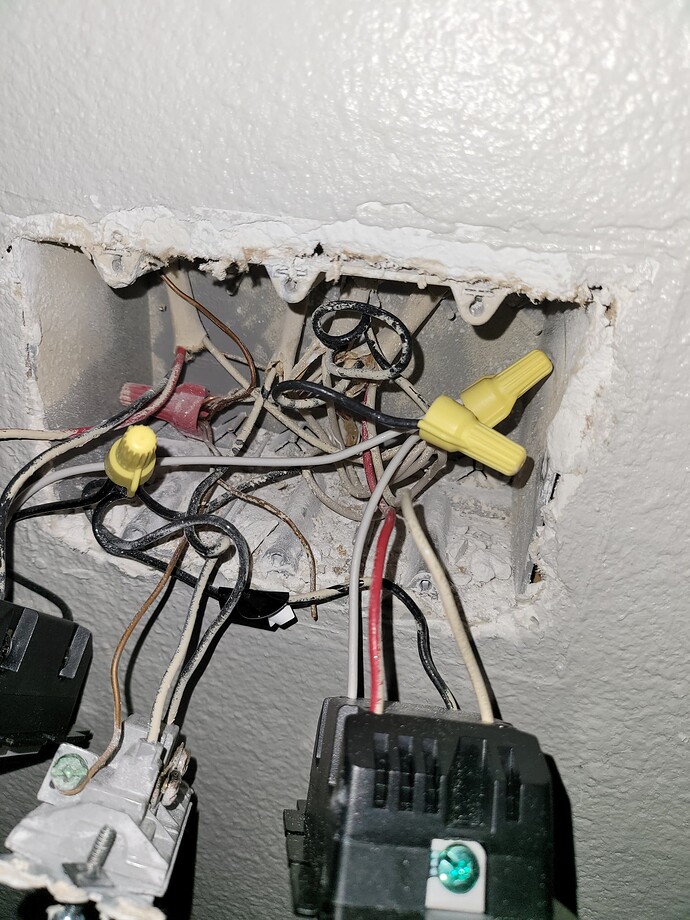
So the BLK on the dumb switch looks like the load. In your first box the BLK is kinda tucked away at the top. Is that wire nutted to another BLK wire?
Just wanted to say in case this gets missed, I would recommend grounding your light switches especially if they were before.
Great. I think this will be easy.
Shut the breaker off.
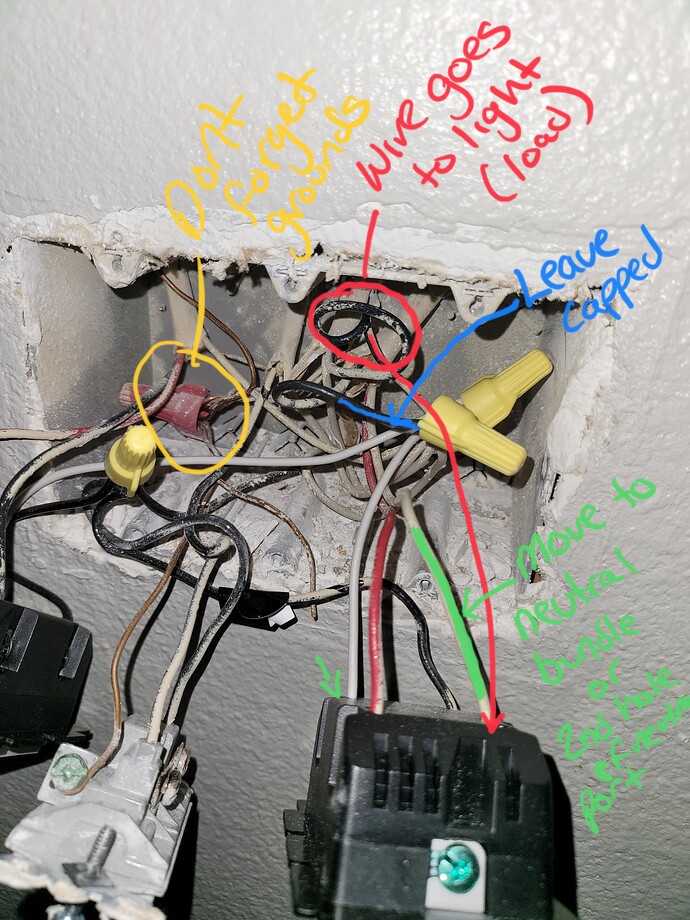
Take the WHT connected to the Load in the dimmer and connect it to the neutral bundle (white bundle in box). Take the BLK wire that is wire nutted (not the one on the 3 way coming back. The other wire). Take a wire nut and cap the BLK wire that is part of the 3 wire Romex (that was circled) Keep the line and traveler as is.
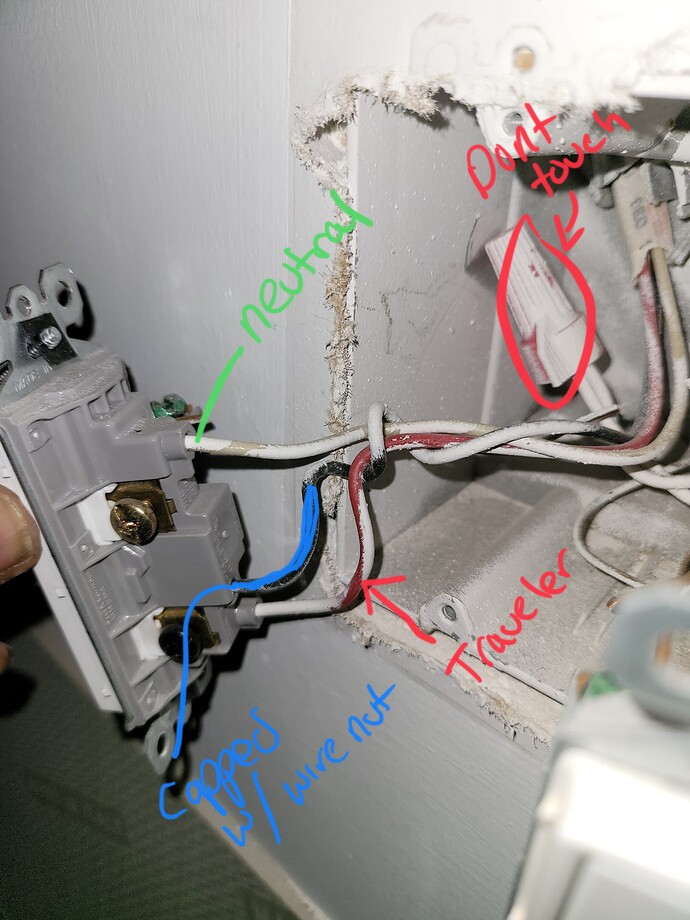
On the dumb switch side. Take the WHT connected to the dumb switch and wire it to the neutral connector on the Aux. Take the red and wire it to the Traveler connection. Cap off the BLK wire (it’s a spare between this box and first box and capped off on both sides.)
Thanks for looking into this.
So let me explain what i understood from your post above.
Take the white wire connected to the load and connect it to the neutral bundle nut in the box.
Take the black wire that is not hot line but is already seperately capped. But its already capped. Why should i touch it, its not connected to any terminal, its just connected and capped with another black wire? or do u mean to pull it out of that capped nut and cap it seperately on its on so its not connected to anything?
Keep the line and traveler as is.
SO that leaves only 2 wires connected to the RED dimmer. Right?
Dumb connection is clear to me… pls correct me if i am wrong above.
So the BLK wire at top in the first box that I circled isn’t connected to anything?
This BLK wire will connect to LOad on the Inovelli.
So 4 wires. Original line, traveler and neutral stay the same. The BLK wire I attached here goes to load. Just verify this BLK is NOt part of the REd and WHT bundle connected to the switch. The BLK circled should be part of a 2 wire Romex.
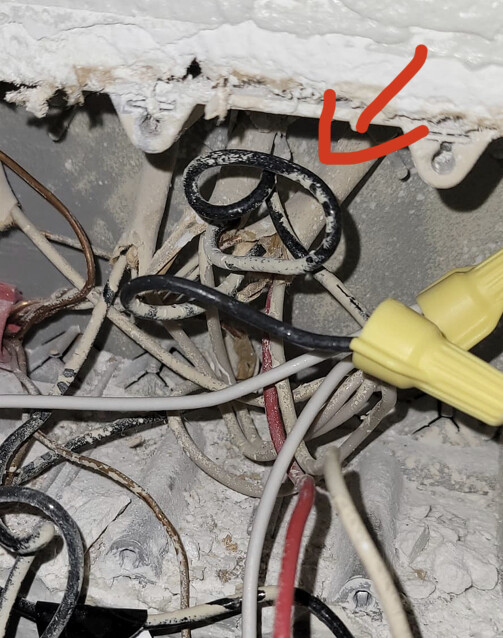
This goes to your light to give it power (assuming I’m seeing the bundles clearly)
Sorry had to step away with family for dinner. I will work on this in the morning, but just before i make this change, i will take clearer pictures in the morning, a lot of it in clear daylight and post it here. Please, again thank you for helping me out. I just need a little more push, then i am set.
I am about to do this. I have understood everything you have mentioned here. However I have one question.
The romex wire has red and neutral attached to the dimmer, but the black from the same romex is capped with a nut with another black wire coming from another romex.
So lets name them.
Romex A. Red connected to dimmer, neutral white connected to dimmer, black capped with a nut but connects to another black wire of romex.
Romex B. No red, looks they chopped red off. Neutral connected to bunch of other neutral wires, black connected to black of romex A.
SO u want me to remove the nut cap from black bunch, and attach black from A or black from B to the dimmer?
I believe it should be black from A cos thats the set of romex the red wires comes and connects to the dimmer, right?
Let me see if I can get my tablet out and draw some lines.
One additional comment in purple. 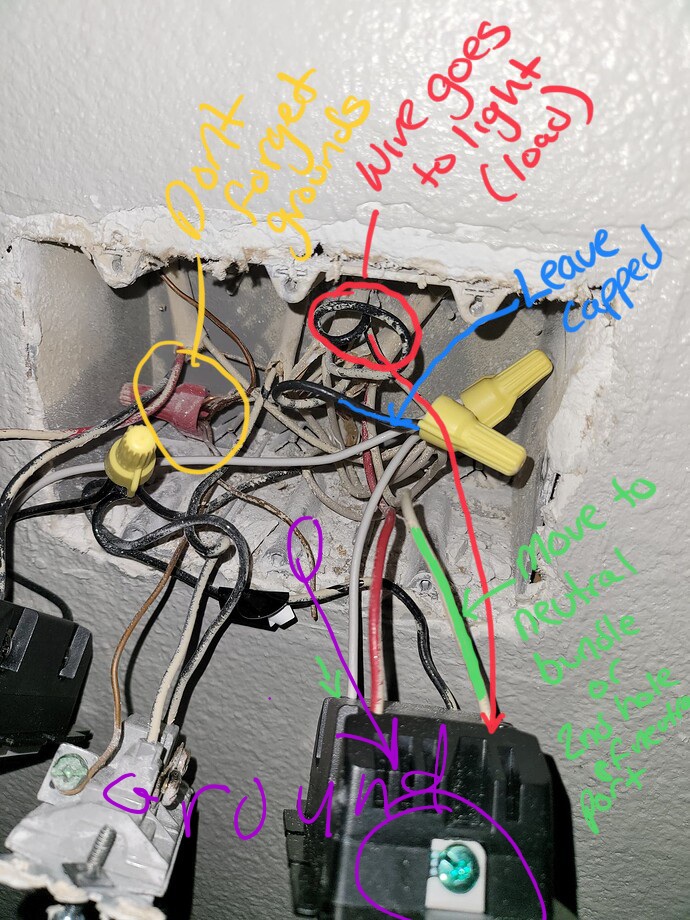
Yea I guess I didn’t express the “don’t forget grounds” statement. I feel like he may need some extra pigtails to make them reach.
@harjms, and others… thank you so so much for keeping patience with me and helping me out with this.
Everything cleared up after your previous explanation and diagram, and I was able to install 15 of these 3 way switches in the house that had similar wiring. Now I am all set. I have close to 120 zooz and inovelli z-wave switches in the house.
I wish Inovelli came out with z-wave wall outlet receptacles as well. I would replace them all.
A side question… how to snap off the heat sink? Is there an easier way, i have a few 3 and 4 gang boxes, and I am unable to install the screwless leviton plates. Due to the heatsink.
@Socrates - Awesome. Glad you were able to knock it out. I’d send the electrician a picture of them installed 
As for as the heat sinks, I use a set of electrician’s pliers and “bite” on one tap at a time (basically I line the tip of the pliers at the crease). Then I go back and forth about 3 times and they fall right off.
Thank you so much, this helps a lot. You have been super awesome!!
