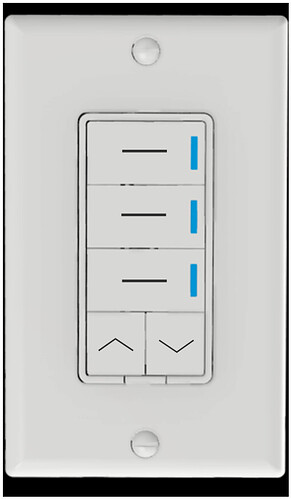
I’d imagine, sending a basic get periodically wouldn’t be a terrible option, either, so that the LEDs on the controller would know if an associated group was turned on externally. Currently, we have to solve this in software on devices like the VRSC4
My old Leviton IWC600 on Vera could do exactly this. Whichever the last scene that was selected, holding the dedicated up/down buttons on the bottom of the switch would dim all of the devices on that scene from their current state. It was really slick. Can’t remember how it worked programing wise… I replaced my vera with smart things years ago and couldn’t ever get it setup to function the same way in ST. But it can be done.
Really looking forward to this, was pointed here by Eric from another thread. I have tried a couple of the older in-wall scene controllers over the years and had very unsatisfactory results. I have at least a couple spots where I could use a good in-wall scene controller. If the number of buttons is not configurable, would definitely would want at least 3 scene buttons plus an “all off” button. An easy labeling or etching solution would be ideal for WAF and GAF (Guest Acceptance Factor). Following this discussion…
Why not make a horizontal bar between the scene buttons and the dimmer buttons. that would give you the width of the switch. You can also play with making the scene button bars horizontal as well maybe even in the middle of the scene button so that it looks a littl emore uniform. You’d have to play around with that configuration…
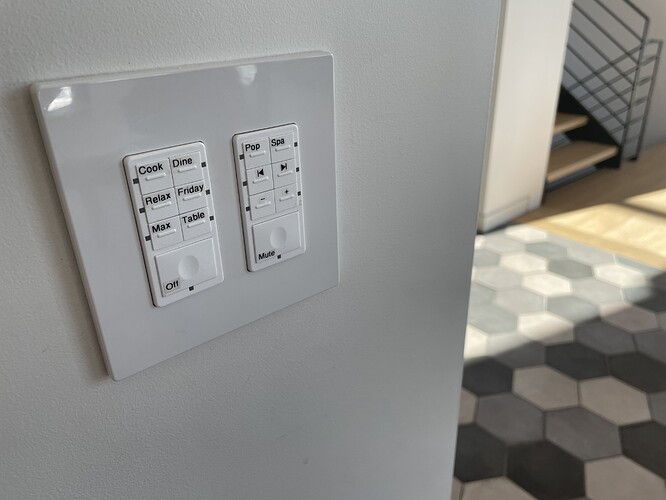
Personally i think the way to go is for the switch to come with two sets of buttons. 1 blank and 1 with a clear window section where a user can slide a transparency or printed paper into the window. The window would look silly if the user didn’t use it hence the blank option. You could provide a few basic options that come with it and the user can make their own slides as well. or maybe order custom ones if they don’t have printing capabilities…
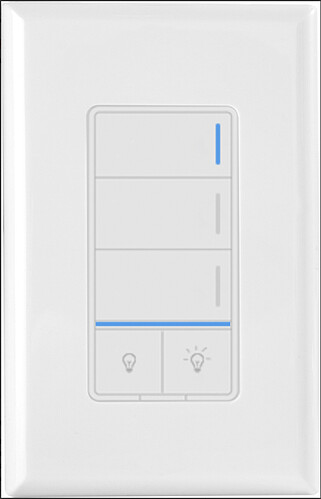
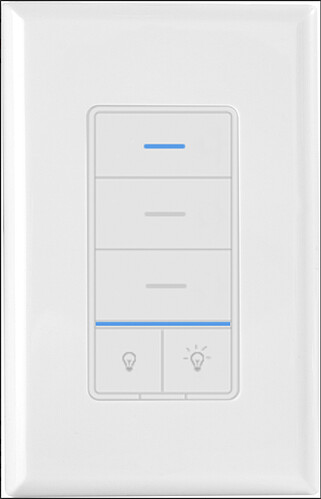
@anon14959390 - I kind of like these (top one). Where are we at with design? I think we still have some wiggle room since they just reviewed the docs and are talking about it with us when they’re back.
Not sure which is the “top one”.
But, I’d suggest that the LED bars lined up vertically on the right edge is likely better, as that keeps the buttons open for etching, stickers, or my favorite: a clear slide in.
The horizontal bar(s) BETWEEN the buttons would work nicely, tho. Esp for the one showing the “dimmer level” Plus, it would be wide enough to perform all the same tricks the Red Series Dimmers can. 
Agree with Eric, I vote for the first one (with lights on the right), leaves room for labels.
If you are limited to this layout of 3 large buttons and 2 small ones, I would suggest that the 2 small buttons (dimmer control) could be used as “All On” and “All Off” instead of a dimmer. I would rather have scene buttons with some sort of push and hold feature for dimming and the ability for more scenes. In the 3 scene/2dimmer configuration, I would have to waste one of the scenes with an “All Off” scene for convenience and that would leave me with only 2 scenes and have to stare at 2 dimmer buttons that I most likely would not use if the scenes were set up, because after all, it is the whole reason to have a scene.
each scene button can be pressed multiple times with 12 scenes total… And I believe the dimmer buttons are also scene buttons if needed. if using smart bulbs, you could turn the relay off and do what you want.
My assumption is the buttons work the same way as the dimmer now which is press once for off or on and hold to dim…
Hi,
Sound like Lutron as been inspiring by Inovelli !
My wish list:
-4 to 5 buttons
-Work with and without load
-Etching or engraving option with back light
-Harmonized design with your existing dimmer (led vertical line).
-Compatible with SmartThings and other system … since SmartThings is starting to be very slow responding with new app.
-Association feature to be able to dim up down group of light.
-Very fast response
-toggle button on off scene
-led indicator
-Screwless face plate grey /black /white for keypad and existing inovelli black serie.
Actually using
Planning to buy 10 keypads for my new house and replace all my existing dimmer with inovelli.
Best regards
Lol yeah @anon14959390 showed us that video a little bit ago. I guess imitation is the best form of flattery ![]()
ZWN-SC7!! Are you on Hubitat?
Hi,
No I am still using SmartThings (very slow since new app) and the keypad are the zigbee version LVS-ZB-SC7.
The keypad don’t have LED indicator working and the button are very small. Night light is also missing.
Those was my temporarily solution at 16$/unit.
I am still waiting for the perfect DIY solution.
Unfortunately lutron RA2 /Crestron / control4 is installer only an very expensive. At the same time I don’t mind paying 200$ for 1 keypad that offer me professional look and DIY possibility.
Orro home is very nice but I think that the display scene face is too small for quick and easy access (non ergonomic/ wife proof). And they don’t have basic unit (cheaper) to suit my need.
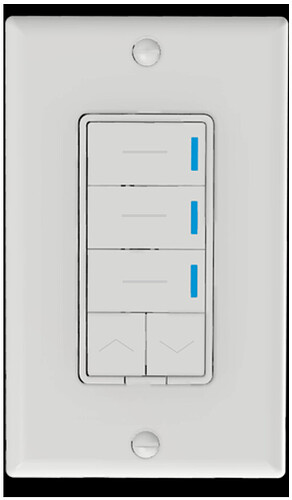
Design wise I think that the sweat spot would be 5-6 horizontal rectangular button like the lutron RA2 or avi-on scene controller with possibility to have bottom split button (arrow up/arrow down) for those who what that option. And to harmonize your product with existing dimmer you need to put vertical LED. I wish to see the LED on the button not the the side. First to save space and have wider button and second to be able to illuminate engraved label. 
Best regards
Mart
Latest update provided up top in the OP. I’m going to try to remember to update each week on Friday any progress that we had on the device. As normal, some weeks may be nothing, some may have a lot!
Looks great. Do the bottom buttons have dimmer bars?
They do not. We opted against adding an additional LED bar to the device.
This is correct. You will be able to set it up that way to control the on/off.
@anon14959390 I would recommend for the visually impaired folks to research in tactile markers on each button. This is something that is very important to me personally (I have visually impaired family) and could expand your customer set.
Something like a bar 1/2" wide and 1/16" high on each of the 3 scene buttons and then an up carrot and down carrot on the up/down would be plenty sufficient for this purpose.
Laser etching could then be on the left side or bottom left corner of each button.
