What do the switches do if there is no hub connected?

I am new to home automation. My wife and I are building a new home and I am planning to add some red series dimmers and get a hubitat hub. There will be a significant stretch during the build and some time during the initial move in where I won’t have a hub set up. How do the switches operate with no hub? Are my builders going to hate me? Will my wife kill me? I’m hoping they still work, just up is on, down is off?

Even after the hub has been installed I’m expecting there will be occasional disruptions/outage with the hub and would like to know how the switches function in those circumstances.

Thanks to the Inovelli community/team. This community seems wonderful and helpful, the team seems thoughtful and engaging, and I’m looking forward to jumping into this world.

Thanks for your time!

Short answer- your wife and builders won’t hate you.
Without a hub, the switches will work just fine as normal switches, and you can turn the light on and off no problem.

Long answer:
The switches will keep working just fine without a hub. You can turn the light on and off and dim it. Any control by associations, either from the switch to another device or from another device to the switch, will continue to work as Z-Wave associations are direct links between devices.

However anything that depends on the hub won’t work. Anything based on scene control, including multi-tap of the paddle or single tap of the config button, won’t work. And any other devices that control the switch OTHER than by hardwired 3way or by direct association won’t work.

So for some examples:

  • Dimmer hardwired to light fixture, tap paddle up/down. Works, light will turn on/off.
  • Dimmer hardwired to light fixture, hold paddle up/down. Works, light will dim up/down.
  • Dimmer hardwired to power, associated to smart bulb via groups 2/3/4. Works, smart bulb control by direct association will work.
  • Handheld remote directly associated to Inovelli switch. Works, direct associations don’t require a hub to function.
  • Multiple Inovelli switches associated together to form a virtual 3way. Works, direct associations don’t require a hub to function.
  • Motion sensor that turns on Inovelli switch with an ‘I’m Home’ scene. Won’t work, scenes require hub processing.
  • Double tap Inovelli paddle to turn on all lights in that room. Won’t work, scenes require hub processing.
1 Like

Additional answer - your electrician may or may not hate you.

While the wiring of 2-way switches and dimmers is pretty straightforward, 3-ways, 4-ways, etc are sometimes another matter. Depending on wiring configuration, the wiring schema will be a bit different from how a dumb-switch-only leg is wired. While it’s not a big difference, it does take some getting familiar with.

Another thing to think about for multi-way legs is the location of the primary box. This will be the box where you want the Inovelli. Ideally, your power should start there. But electricians are often creatures of habit. They are accustomed to doing things in certain ways because they probably work on new homes in multiples.

For example, if they are running a multi-way switch leg, the first box they come to Romex-power-routing-wise is where that leg is going to start. But that might not be where you want the Inovelli. Because with dumb switch wiring it doesn’t matter on which “side” you start the leg.

Now there are ways of wiring the Inovelli in the other box, but now you are introducing an Aux into the mix. More wiring variation from the dumb switch world. And that’s only for 3-ways, not 4-ways and up. Get the point?

So ideally, you hope to have an electrician savvy in smart switch wiring . . . ideally Inovelli, as they wire differently than a Zooz, for example. I know it shouldn’t be difficult for an electrician, but I can still see some shaking their heads.

Another thing to think about is that multi-way Inovelli dimmers have settings that need to be set. I know you can set them via the switch, but is your electrician going to be able to do that as he is testing his work?

I’m not suggesting that you shouldn’t have smart switches wired from the get-go. Just trying to point out some things to think about.

But maybe your electrician will be smart switch savvy. In that case, disregard the above, lol.
Hi Steven,
Welcome to the community!
As Chris says, simple operations will work fine without a hub. There’s a little configuration you will probably need to do on most of your switches - set the mode for load only, multi-way with dumb switches or multi-way with “aux” (a.k.a. Add-on) switches. This can be set on the switch itself (it’s a bit awkward but certainly do-able). The multi-way circuits probably won’t work properly without the config. In a new house, you should have neutral available in all the boxes (I believe this is current code, @bry or @harjms will know), so likely no need to worry about that setting (but maybe confirm with the builder). For multi-way circuits there are 3 possibilities for the other switch - “normal” dumb on/off switches, “aux” switches, or another Inovelli switch - have you seen the writeups on how to choose? Finally, again for the multi-ways, you’ll want to decide which switch is the Inovelli & which is the other - I believe it’s easier to change your mind later if the cable to the lights connects from the box you want to have the Inovelli in.
This is all assuming you are planning on “ordinary” bulbs/LEDs - Smart bulbs, via association will work without a hub, but will need a hub to initially configure - so you’re fine for the “occasional disruption”, but not so much for the builders.
There are occasional compatibility issues (flickering, buzzing) between particular brand/model of dimmable LED & the Inovelli dimmers - you might want to test a few of the bulbs you are planning to use before doing the entire house.

Yes in the US and I’m pretty sure Canada too.

Excellent point on the LEDs. This is going to apply to high hats if you’re using them. The client typically specs the size and style, trim ring, etc, but not the brand. These won’t be retrofits, so you want to insure the brand of light is compatible with the dimmer.

1 Like

Excellent! I don’t need anything fancy at the start, I just want to make sure the lights work. After we have moved in and set everything else up, then I can work on the ‘fun’ stuff.

My brother is my electrician, and we are doing it together. He’s not legally allowed to hate me, right?

Is there some good resources or guides for how to wire this up properly?

I’m in Canada and 99% certain their will be neutral wires throughout.

I have not yet seen the write ups on how to choose the other switch, but would love to see some!

The plan is to use ordinary bulbs, which I understand you’re saying should be fine? Any ideas which brands/models cause issues, or what the cause is?

That’s perfect. And AFAIK, he is not allowed to hate you, lol.

Here’s a couple tips to get you started . . and you can always post back as you get going.

  1. For any multi-way, start the power in the box that you want the Inovelli to go in.
  2. You should determine for your multi-ways if you want to use Aux switches or dumb switches for the remote switches. It shouldn’t matter for the rough-in but it’s good to plan.
  3. Refer to the Inovelli wiring diagrams below.
  4. For high hats, if you’ll be using dimmers, review the bulb compatibility list, below.
  5. For fans with a light kit, IMO it’s better to use fans that have replaceable bulbs. Some the the integrated LEDs in fans aren’t compatible.
  6. For fans, if you want speed control via switch, it’s better to buy one that doesn’t use a remote and has a dumb reversing switch on the housing.
  7. Not sure if you’re planning on using a LZW-36, but even if you do, use a 2-gang and run a 3-wire as normal (for if/when things go south). My preference would be to use two separate switches vice the LZW36 for the fan. (I’m sure some will disagree with me . . . )
  8. If you’re dimming LEDs and they don’t go all the way off, use a bypass. It goes in parallel at the light box.
  9. Your brother will figure this out quickly, but don’t use the white pigtails that come with the switches. He’ll understand.
  10. Use the 2nd backstab holes on the switchs to daisey-chain hots and neutrals.

Excellent! Thanks

For 3 way dimmers I can use two Inovellis, right? Is there any disadvantage to this?

When you talk about high-hats, what are you referring to? I’m not familiar with that, but assume you mean those flat LED ‘pot lights’?

I love this community! Thanks for all the help everyone.

As for compatible lights, is that just for LEDs? Would I have issues with CFLs?

Yes, that just applies to LEDs. I’m not aware of any issues with CFLs or incandescents. I run CFLs with my dimmers without issue.

Hi Steven,
Your multi-way options…
“Dumb” switches - cost: cheap! On/Off only. No predictability between up/down & on/off. No scenes.
“Aux”/Add-on switches - cost:~$20. Dimmer function available, Bottom is always off, top is on. No scene control (this may become available in the future)
Multiple Inovellis - cost:~$35. Dimmer available, scenes available, LED dimming level indicators can be kept in sync (associations).
(Costs are very approximate)
Dumb & Aux options are configurable from the switch (without a hub). Multiple Inovellis & the association between them will need a hub (so only the main switch - the one with the load connected - will do anything for the builders)

Yes, you can use 2 Inovellis. Take a look at the following for limitations. You can probably ignore the non-sync’d LED bars discussion. I believe that’s working now, at least in some configurations.

Yes, I’m referring to the mostly flush lights you mount in/on the ceiling.

My electrician-in-law has a few choice words whenever I invite him to, um, participate :laughing: in a new project. He is obviously a member of the wire nut cartel, and was not happy when I handed him a Wago connector to tie all of the neutrals together when wiring an LZW36 ceiling light/fan canopy module.

If I ever build a new house, every wire will be spliced with Wago connectors and not wire nuts…

1 Like

What’s the advantage of the Wago connector? Smaller?

Supposedly quicker and easier with short wires on a retrofit.

I’ve never used them but I’ve heard pro and con. They work like the backstab force fit holes on switches and receptacles. Generally people say they hold but I’ve heard of complaints about #12 wire popping out when the connectors are turned at a angle. Some distrust the thin bar holding the conductor but others have never had any fail.

@JohnRob has used them so he can comment. I don’t think he likes them.

1 Like

Speed of install, especially when tying together multiple wires. This is why the wire nut cartel (electricians paid by the hour) talk them down and discourage their use. From what I’ve read, they are widely used in Europe where mains power is 240V and some countries use stranded wires to switch/outlet boxes.

Wago connectors are great for binding multiple gauges of wire together, including the stranded pigtails in many Inovelli boxes. Just strip the wire, put it in the hole, and flip the lock lever down. As an added plus, they are re-usable if you need to take the wires apart by simply lifting the lock lever and pulling the wires out.

The biggest pitfall is cost, and that they don’t have as solid of a bite on solid conductor as they do on stranded wires. I started using them when we did the ceiling fan installs back in July, and will never go back to wire nuts for my own house and projects…

As Bry suggested, I am not a fan of the Wago parts for permanent installation. For my home I am pretty conservative.

I will admit they are easier to connect multiple wires than twisting them and securing them with a wire nut. However the Wago seem to be less compact and may be susceptible to twisting when packing a lot of wires behind a larger than standard switch (as most smart switches are).

I don’t do wiring as a job, it is limited to adding a few switches here and there. And its my home where my family and I live. So the extra time to put a good wire nut on the connections I feel is well worth my while.

For a really short wire I would wire nut a #14 extension (6’ or so) then tuck that wire nut into the box somewhere where it will not be moved again in an effort to protect that short wire. My concern is that if the short wire breaks then a small job has turned into a big job.

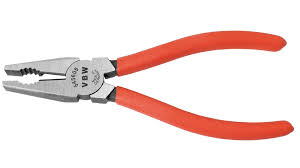
BTW I use a combination pliers having a wider jaw is great for twisting 3 wires, the 4th is a little harder but not too bad.

image